While many people have conducted Zoom meetings, organizing a more formal presentation or event around Zoom may require additional considerations. This article entails a simple checklist and FAQ for these types of events. The suggestions below have in mind an audience of approximately 10 to 60 participants. However, these tips can readily be scaled up for larger groups.
While planning and setting up your event, make your way through the checklist below and fill out the Zoom Meeting Checklist form if you would like additional support. As you come across questions, check out the FAQ section at the base of this article.
Checklist:
- Update to the most recent version of Zoom
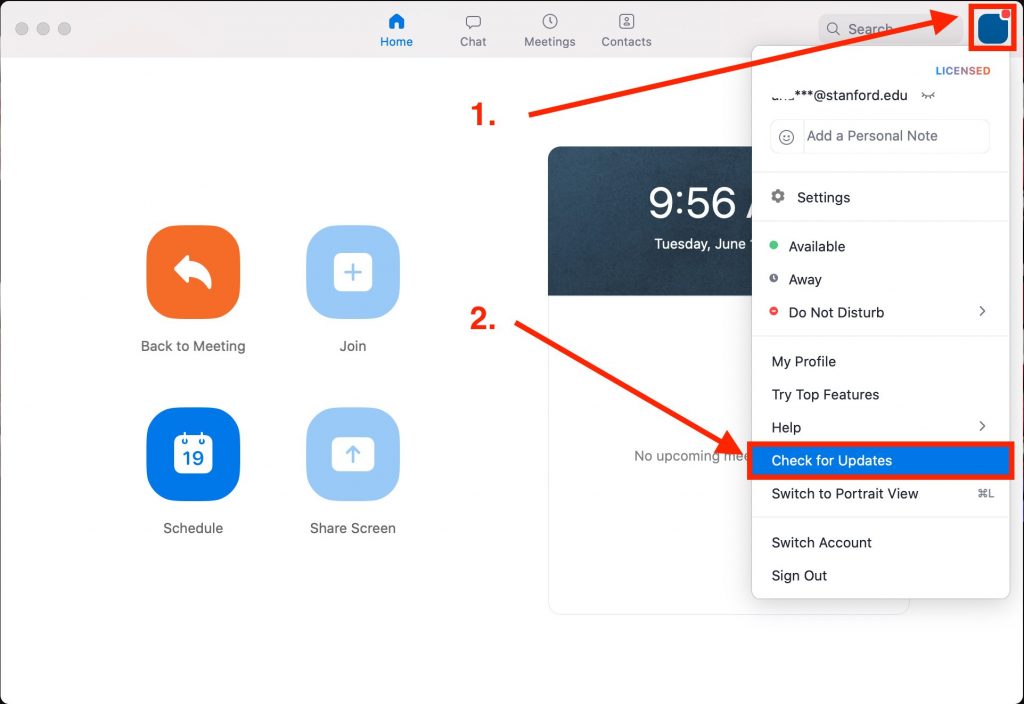
- In the Zoom app “Home” tab: click on your profile icon at the top right, and click “Check for Updates” in the dropdown menu as in the image below:
- Set up a meeting with your co-host (if you have a DA or TA, make sure you’re both on the same page)
- Have a backup copy of slides/material sent to an alternative host/presenter
- Do a rehearsal run with participants (to share screen with notes, etc.)
- If you have a two-screen setup, be sure to test out how PowerPoint or Google Slides shows up for your audience. For more information, see the FAQ section below called “How do I see my presenter notes while screen sharing?”
- Be sure to test your audio devices (e.g., headphones, microphones, and speakers) and check if your internet connection is stable and working properly. Additionally, it is recommended that all devices be on silent or do not disturb mode to prevent any unwanted distractions during the event.
- Try out the arrangement of windows on the presenter’s screen. (e.g., how does the “chat” show up? How do secondary browser windows appear upon sharing your screen? Is this arranged for your preferences?
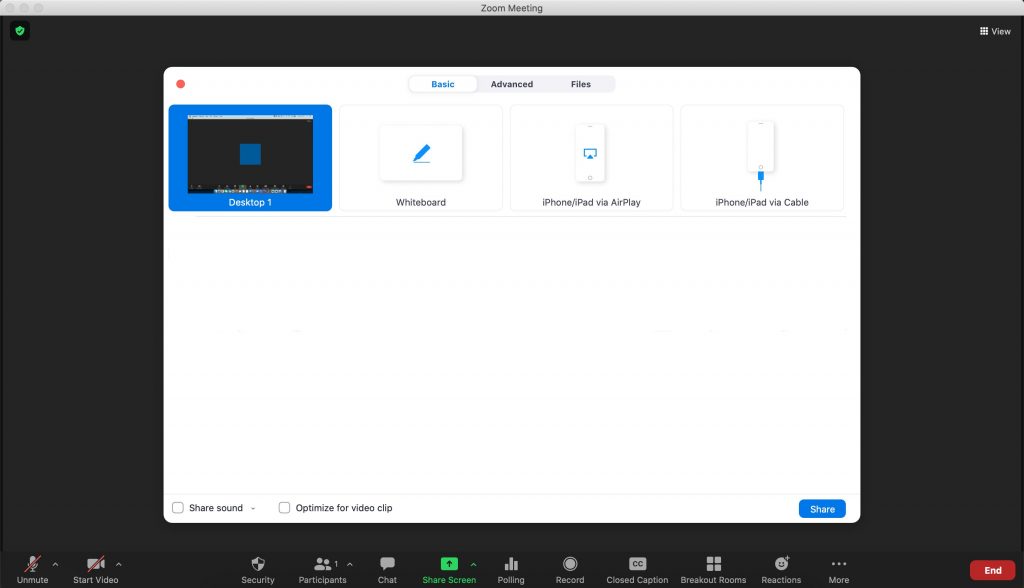
- Decide between sharing your full screen or a specific window. (Generally, if you are showing any other programs, sharing your whole screen is recommended.) To share your full screen, select your monitor name from the “Share Screen” menu, which is usually the first option available as per this image:
- Check meeting settings if host:
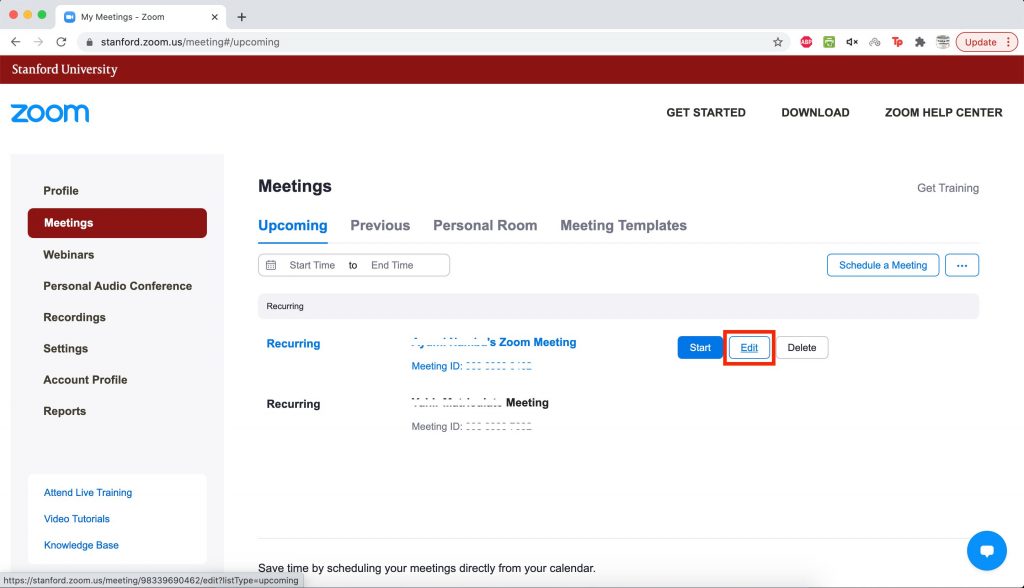
- Go to stanford.zoom.us > Meetings > Edit > Save (when done). The “Edit” button is located next to your specific meeting name in the “Meetings” tab as seen below:
- Recommended Zoom meeting settings:
- Mute participants on entry
- Set up alternative hosts (note: must have stanford.edu email address)
- If you have guest participants/speakers from other organizations (not Stanford), make sure the “Require authentication to join” option is either unchecked or set to “Zoom users anywhere” in the dropdown menu.
- Recommended security settings
- More details and suggestions here
- Shut down all programs other than Zoom to maximize working memory
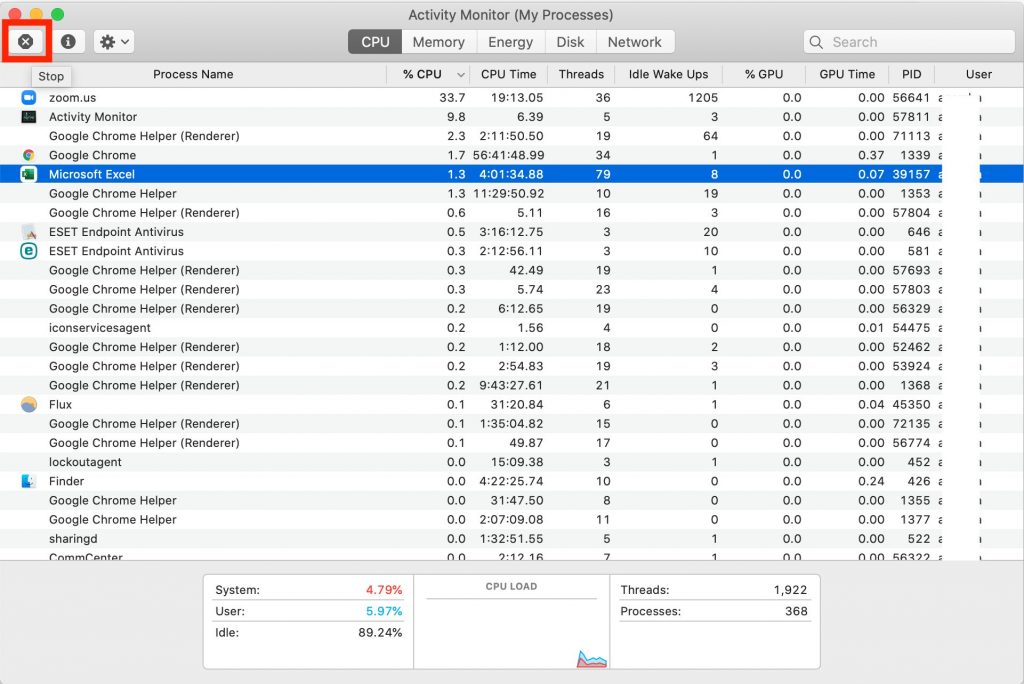
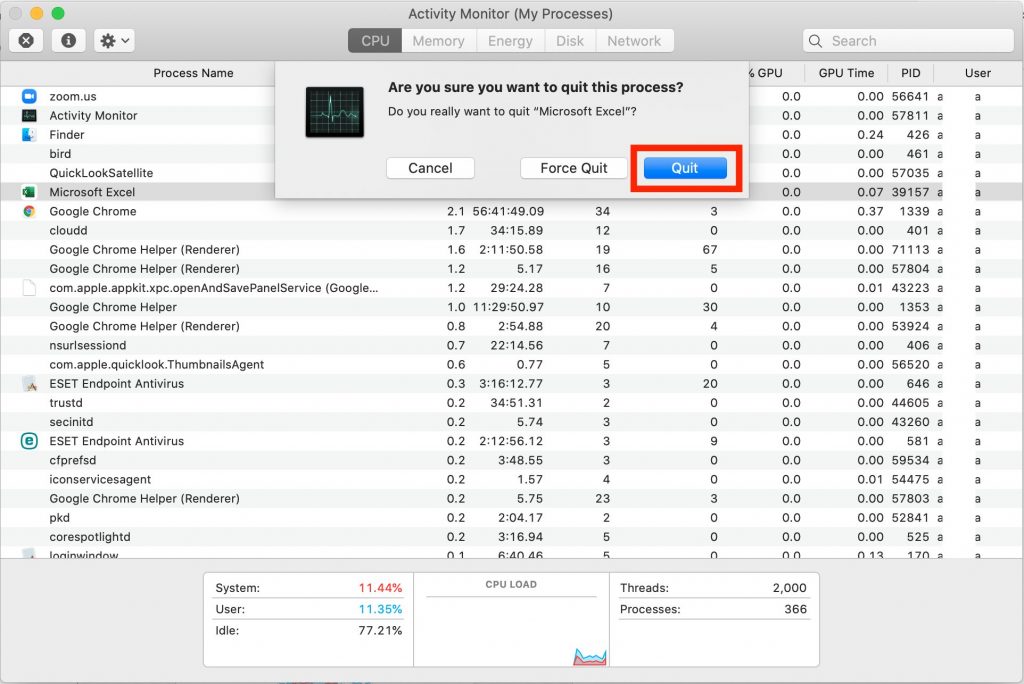
- For Mac: check any running programs with the “Activity Monitor” app (search in Finder). Quit any irrelevant programs. Once you are in the Activity Monitor, you can either quit any undesired programs using the “Stop” button located in the top left as shown below, or right click on the process and select “Quit” from the dialog box.
- Method 1: Select the program, and click the “Stop” button in the top left as shown below.
- For Mac: check any running programs with the “Activity Monitor” app (search in Finder). Quit any irrelevant programs. Once you are in the Activity Monitor, you can either quit any undesired programs using the “Stop” button located in the top left as shown below, or right click on the process and select “Quit” from the dialog box.
- Method 2: Right-click the program and in the resulting dialog box, click “Quit”.
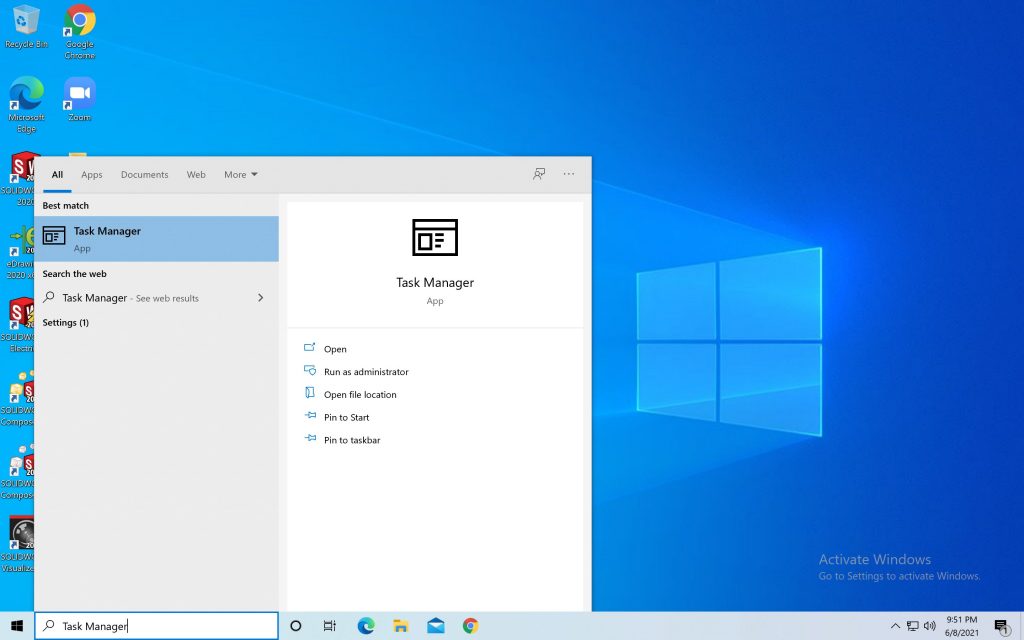
- For Windows: open Task Manager and the Processes tab to view any running programs. Task Manager can be searched for in the Start menu as shown below.
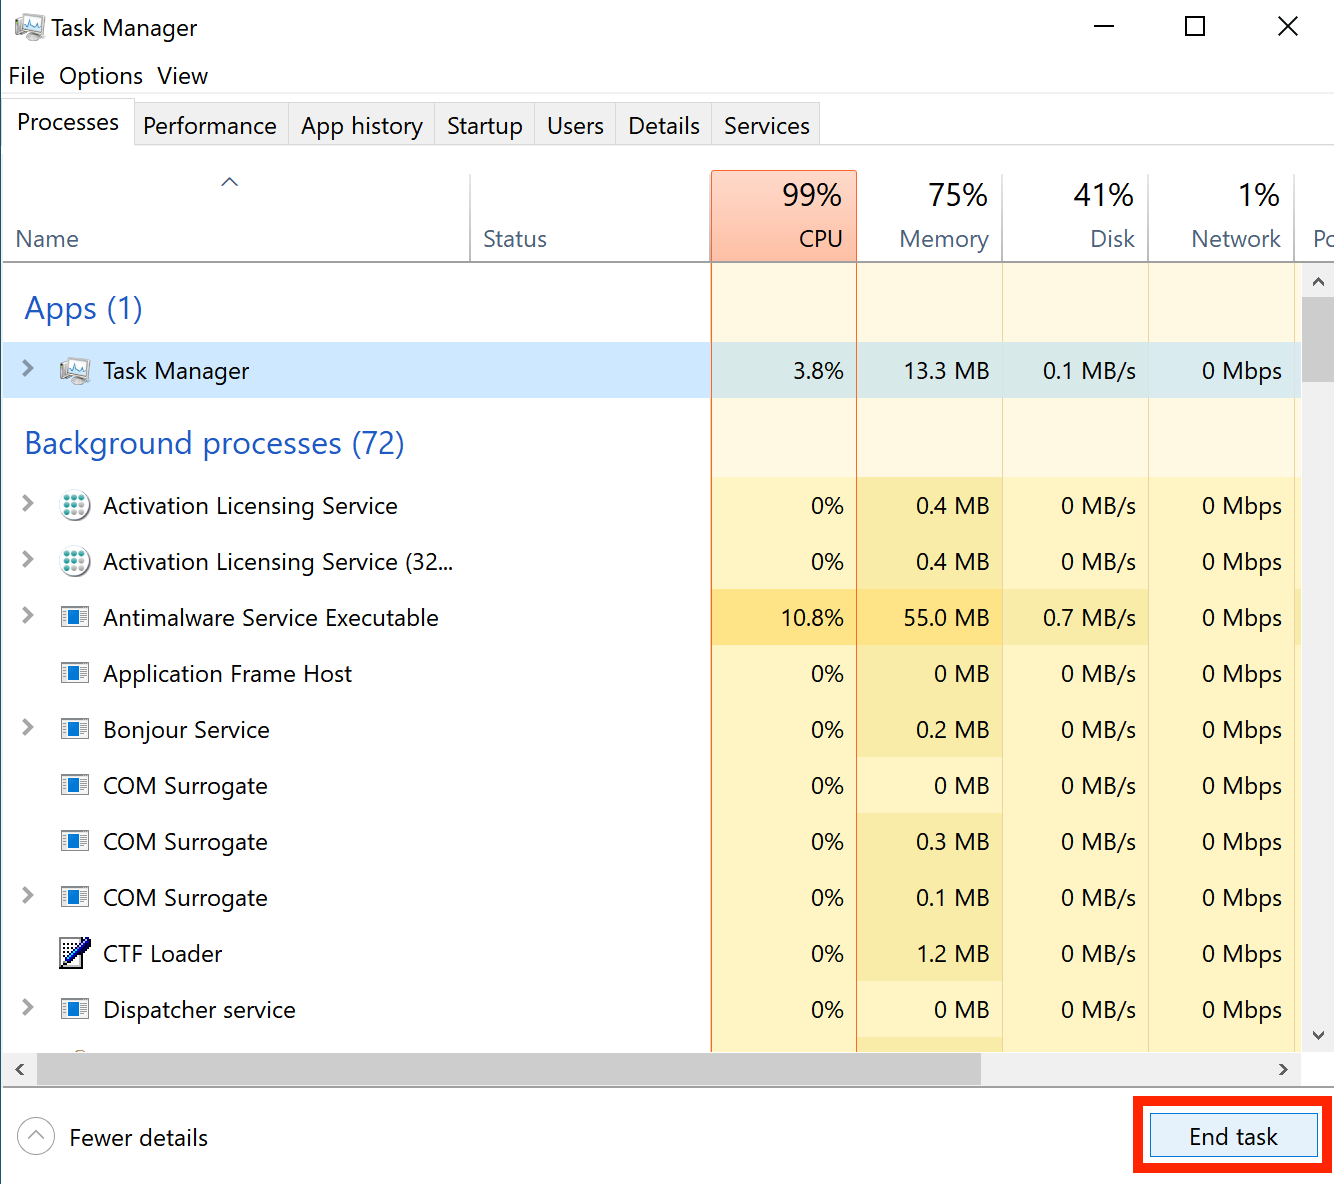
- Method 1: Select the app and click “End task” button at the bottom right as shown here:
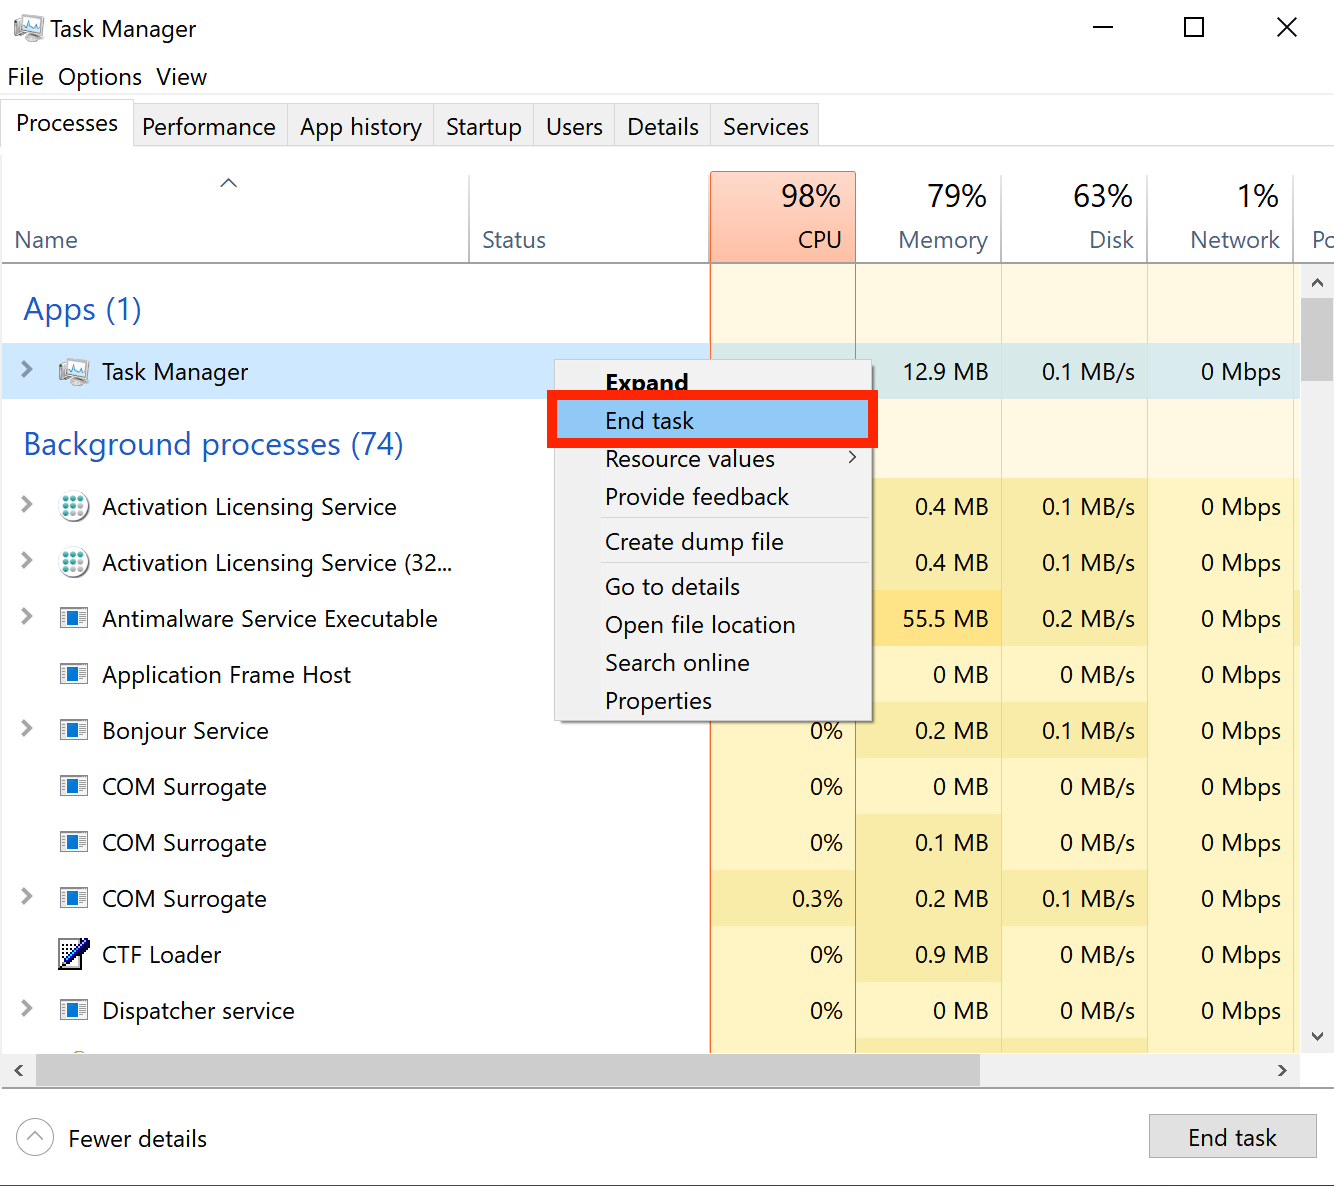
- Method 2: Right click the app and click “End task” from the dropdown menu as seen here:
- Double-check the Zoom information and link sent out to participants is for the correct meeting.
- The link should have the password embedded (e.g., users can simply click to join without entering a passcode). You can check this by ensuring “pwd=” is in the link (e.g., https://stanford.zoom.us/j/1234567890?pwd=L3TT3r5AndNuMB3R5)
- Make sure to include the password itself in the invite, as well as telephone numbers in case someone needs to call in.
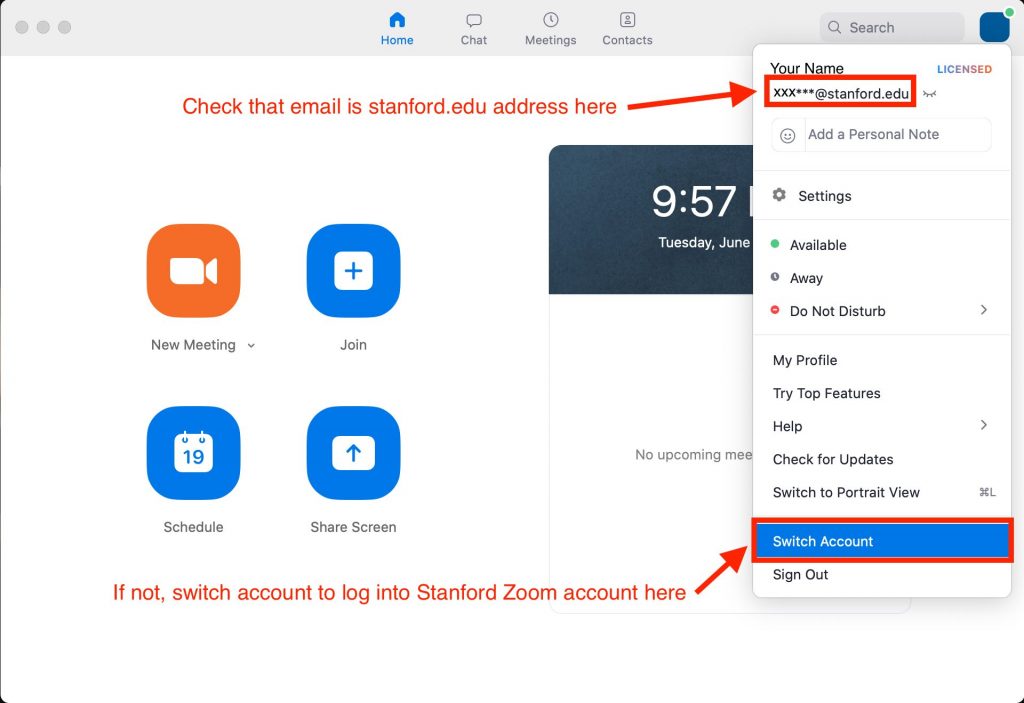
- Make sure to join the meeting logged into your Stanford Zoom account. You can check this by opening the Zoom application and clicking on the icon in the top right corner. Your stanford.edu email address should be displayed below your name.
- You may log in to your Stanford account otherwise by clicking “Switch Account” in the same dropdown menu. The image below shows where you may check your account information and switch accounts.
FAQ
- My video or camera isn’t working
- My audio isn’t working
- How many participants can I have?
- Regular Zoom meetings have a limit of 500 participants while webinars a limit of 1000 participants.
- Increase participant limits for webinars by filling out the Stanford Capacity Webinar License form.
- I’m having a screen share error.
- Try screen sharing again after a few moments.
- Check that all irrelevant programs are shut down.
- Try sharing from a different program (e.g. Google Slides in a browser vs. Powerpoint).
- If the problem persists, leave the meeting and return.
- If all else fails, have another person share their screen for you, and either advance slides verbally (“next slide, please”) or ask them to give you remote control of their screen.
- How do I see participants while screen sharing?
- After sharing the screen, click the three dots (“More”) menu located in the screen share toolbar. Click “Show video panel” as per the following images (Note: if no participants have their video on, this option will not be available).


- How do participants see me while I’m screen sharing?
- Zoom side-by-side mode: this should be a default setting for most participants, but if they cannot see the speaker they should:
- How do I see my presenter notes while screen sharing?
- In Powerpoint:
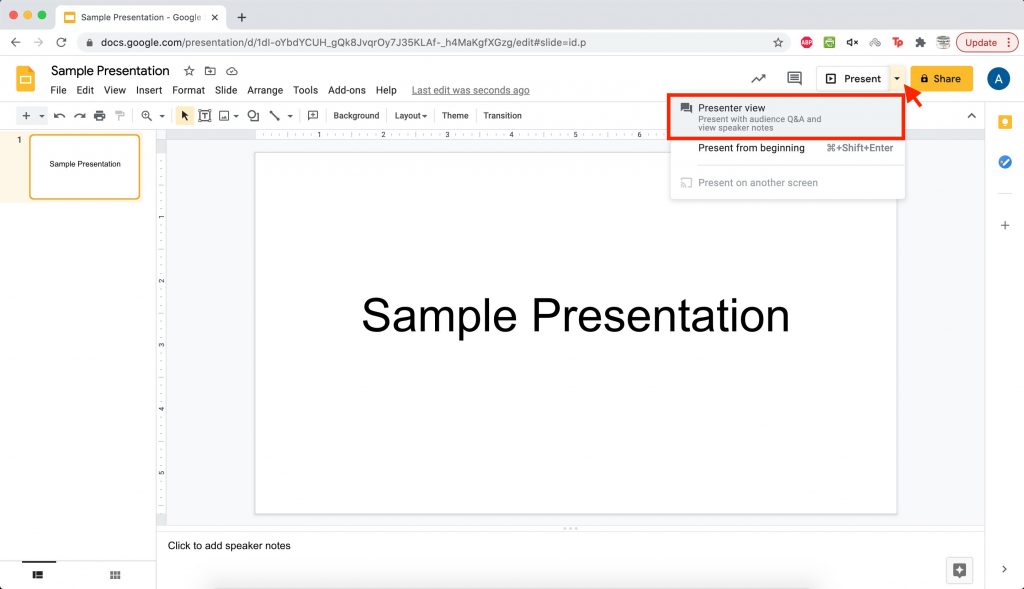
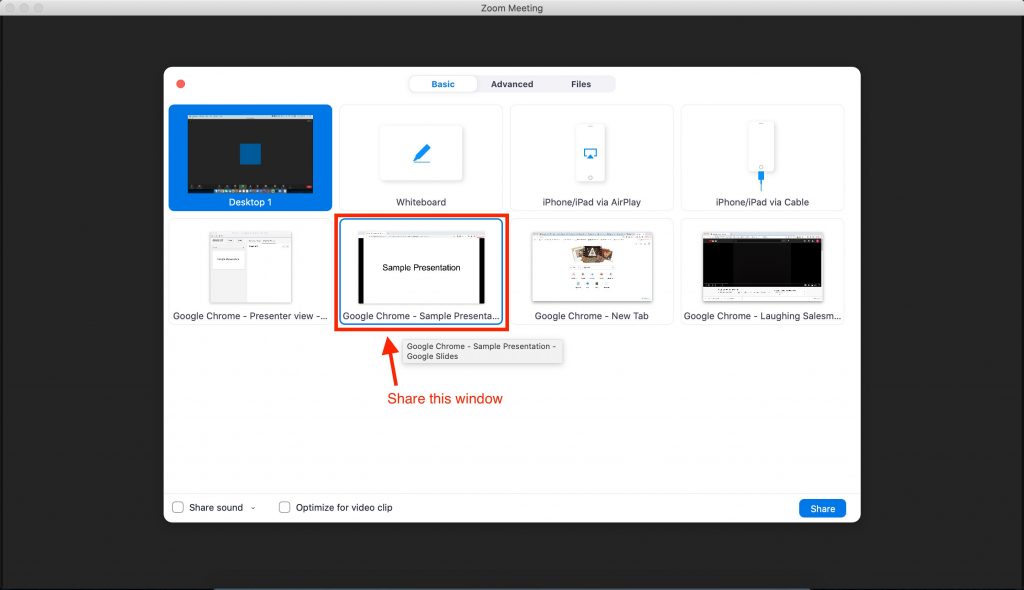
- In Google Slides: In the presentation, from the “Present” dropdown menu in the top right corner, click “Presenter view”. Then share only the window with the presentation slides open from Zoom. The steps are illustrated in the images below:
Not seeing your FAQ? Check out the extended documentation here.