What does this look like in a classroom?
In Zoom version 5.2, a new feature was introduced that allows you to share your slide decks professionally. Similar to the virtual background feature, the “Slides as a Virtual Background” feature will enable you to overlay your video (alongside readjusting the size window and moving it around) on top of your slides.
This allows presenters more flexibility when it comes to sharing slide decks and gives them the freedom to control the “screen real estate” and how much certain things can take up space compared to others. Using this feature is highly recommended as it allows students to see both you and your presentation better.
In addition, this also provides a smoother transition into share screening as you can still see the presenter without taking the emphasis away from them. This can be potentially less distracting as participants would still be seeing the presenter within the same window (and not in a separate one like in the regular share screening option).
Tools to make this happen:

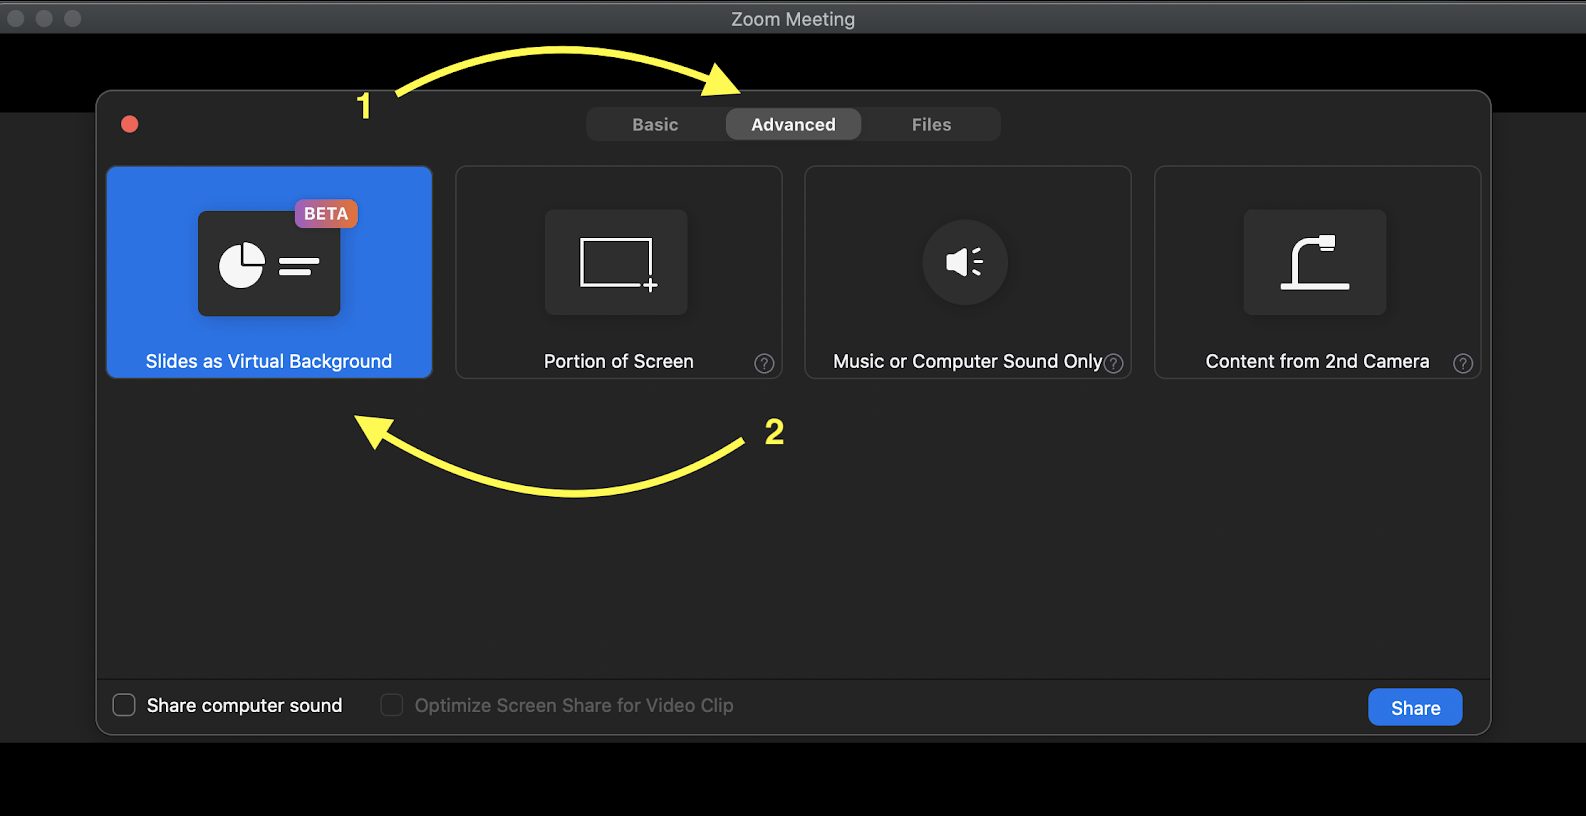
To start using this feature, click on Share Screen (as you would normally) and then choose Advanced from the menu that pops up and then Slides as Virtual Background. You will then be prompted to select your presentation file. It’s also important to note that the only acceptable formats that work with this feature (as of now) are Keynote and PowerPoint presentations.

The below GIF shows the resize and move aspects of this feature in action!
External resources:
Present with PowerPoint as Virtual Background in Zoom Meeting (Video Tutorial)