This article contains information current as of Zoom Version 5.4.9 (January 11, 2021). For the most up-to-date guidance on using breakout rooms, please visit the Zoom Help Center.
Breakout Rooms for Zoom 5.4.9
- Host and Co-hosts can create and manage breakout rooms
- Co-hosts have the same breakout room controls as the meeting host, such as starting or ending breakout rooms and assigning participants
- Hosts and co-hosts have the option to assign a participant back to the main session, rather than ending all breakout sessions.
Multiple Breakout Sessions in the Same Class:
- To first use pre-assigned rooms followed by randomly assigned rooms: upload pre-assign and start, when ready for the next breakout you can manually assign to different rooms
- To first use randomly assigned rooms followed by pre-assigned rooms: we don’t think this is possible unless you restart Zoom
- To use multiple assigned groups: Use TA or a break time to manually set breakout rooms from the original pre-assign list
Reducing or Extending Breakout Times
- You cannot extend the timer once started, but when the timer ends Zoom asks if you want to end all the breakout rooms. You can continue in breakout rooms, but without a timer.
- Step 1. Set timer for breakout rooms
- Step 2. Send broadcast that you are extending or reducing time
- Step 3. Reduce: select end breakout rooms early / Extend: when time runs out, select keep breakout rooms open
Host View: Creating Breakout Rooms During the Meeting
- Decide who will act as host
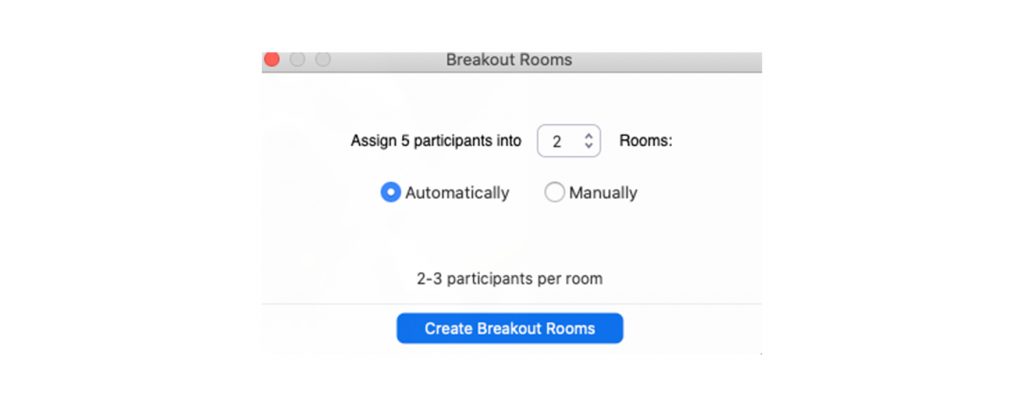
- Click on the Breakout Rooms Menu
- Enter the number of rooms you want to create and click Create Breakout Rooms.
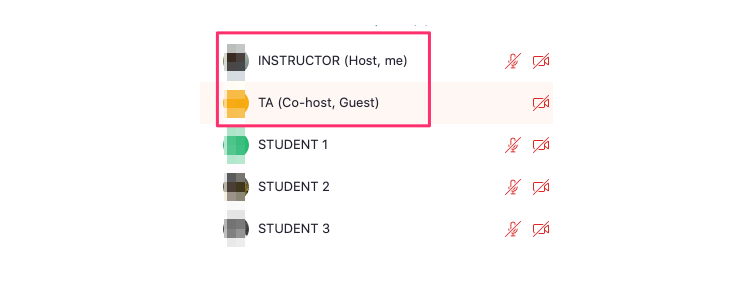
- Your co-hosts will also be assigned to a breakout room randomly. If this is Pair-and-Share activity, click on the Add a room button and move your co-hosts into a new room (you can name your breakout rooms) and move your students to a different breakout room. (See the suggested workflow below)
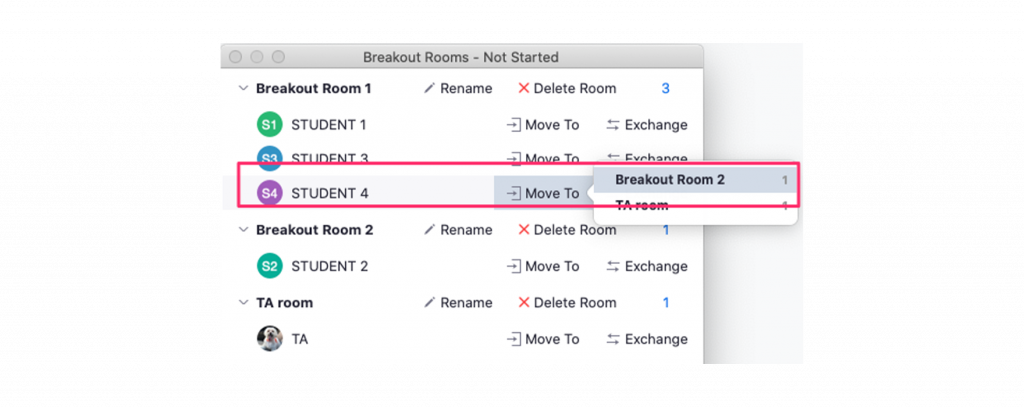
- Create another room by clicking the Add a Room button. Rename your room if necessary.
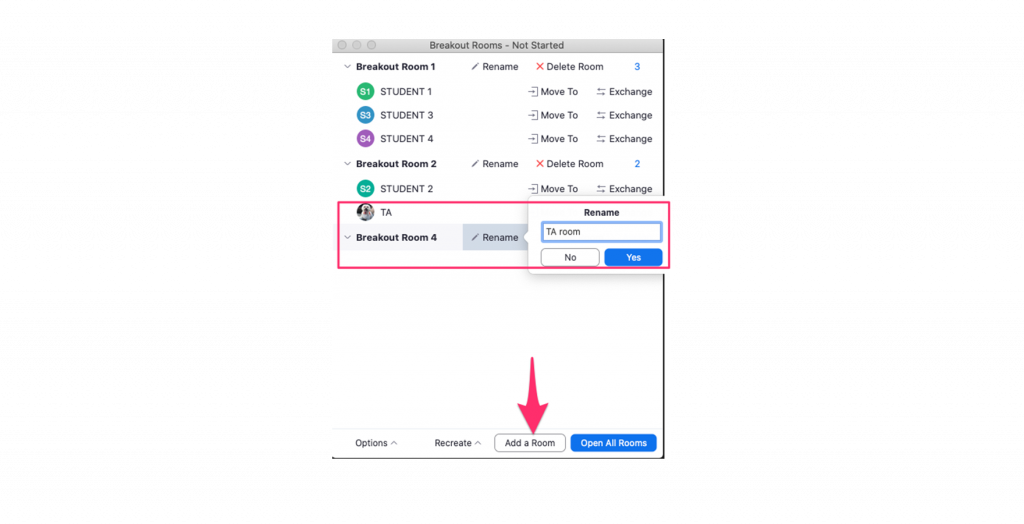
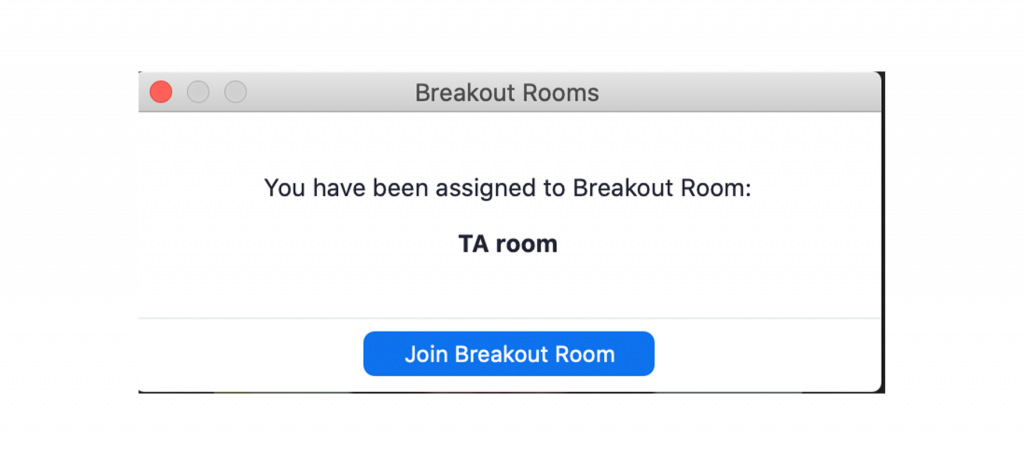
- 6. Move your TA(s)/co-host(s) to your new room. (e.g. TA room)
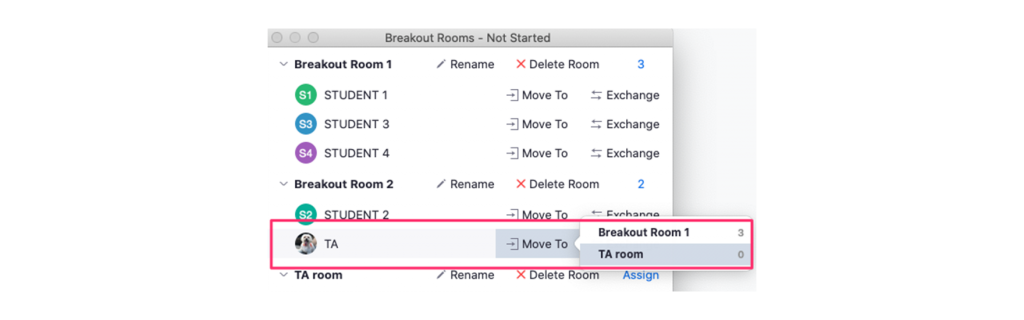
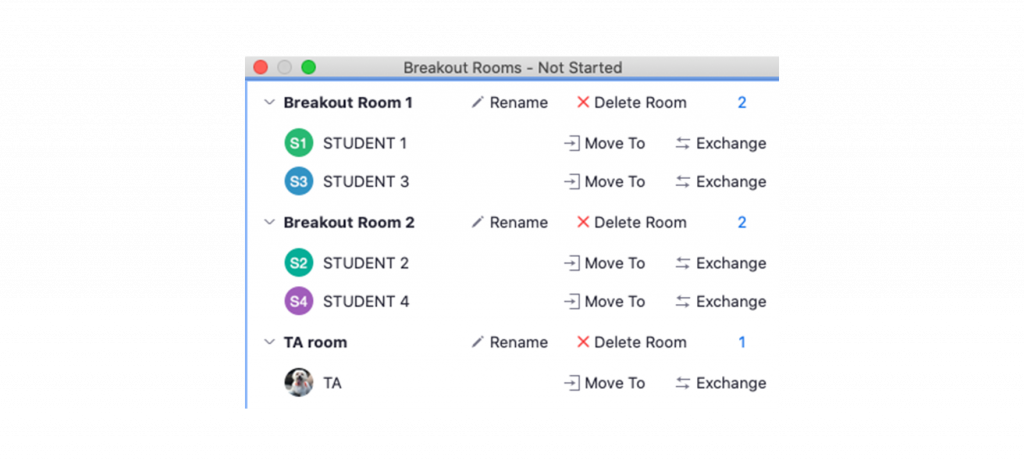
- 7. Move your students/participants as necessary to balance out your breakout rooms.
- 8. Change your breakout room options as necessary:
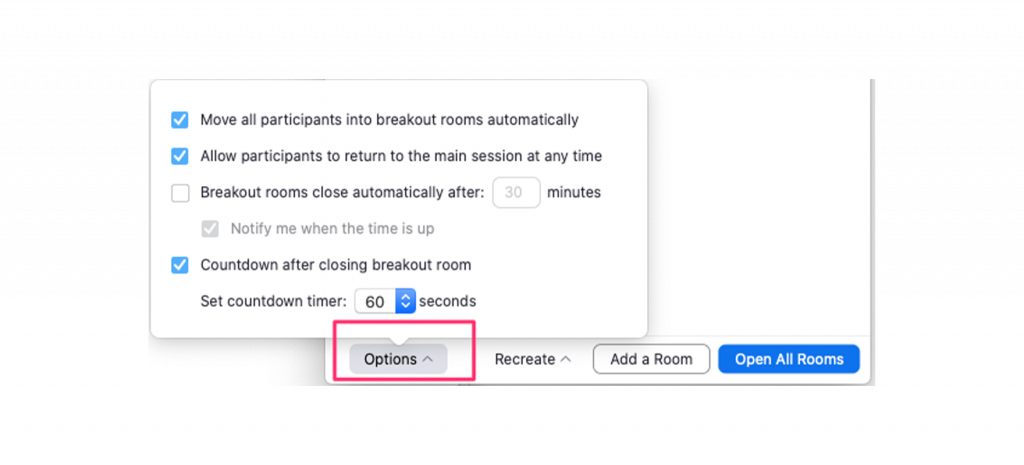
- 9. When you are ready, click on Open all Rooms.
Co-Host View: Joining Different Breakout Rooms
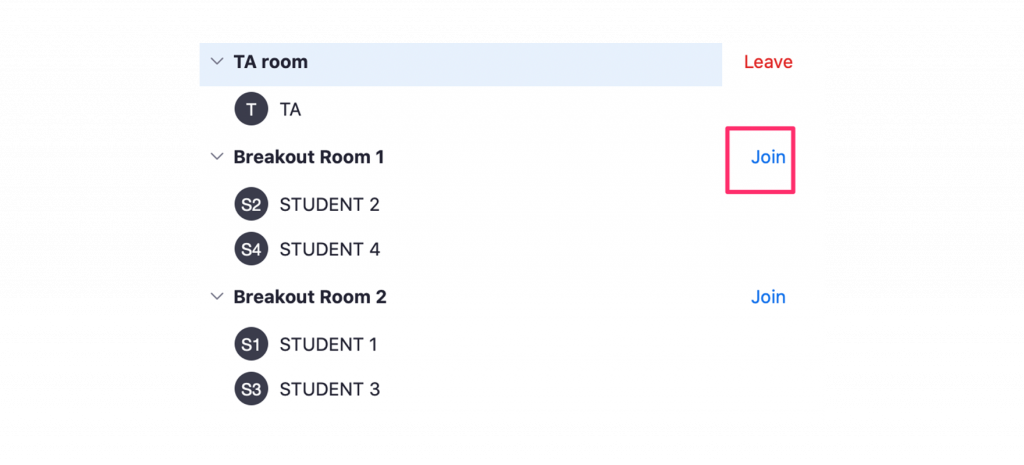
- Once the host opens all rooms, you’ll see the Breakout Rooms menu
- You must be assigned to a breakout room by the host.
- You can only move from a breakout room to another breakout room.
** You are not allowed to move to a different breakout room from the main room. If you leave your breakout room by accident, press the Breakout Rooms menu again and join the previous room.
Set Up Pre-Assigned Breakout Rooms
- Visit stanford.zoom.us and log in with SUNet ID and password
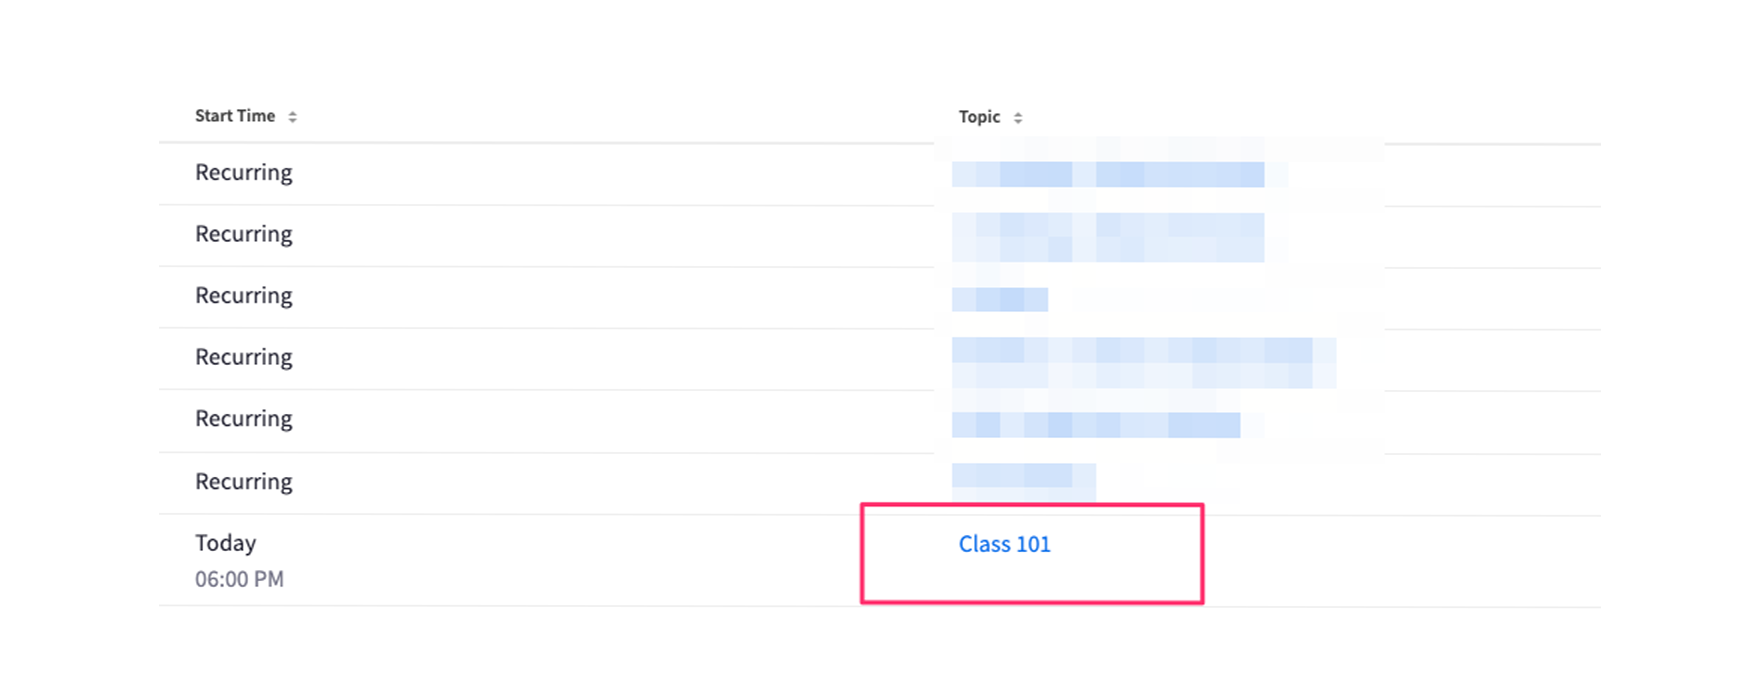
- Select your scheduled meeting under the “Upcoming meetings” > Edit this Meeting or schedule a new meeting.

OR

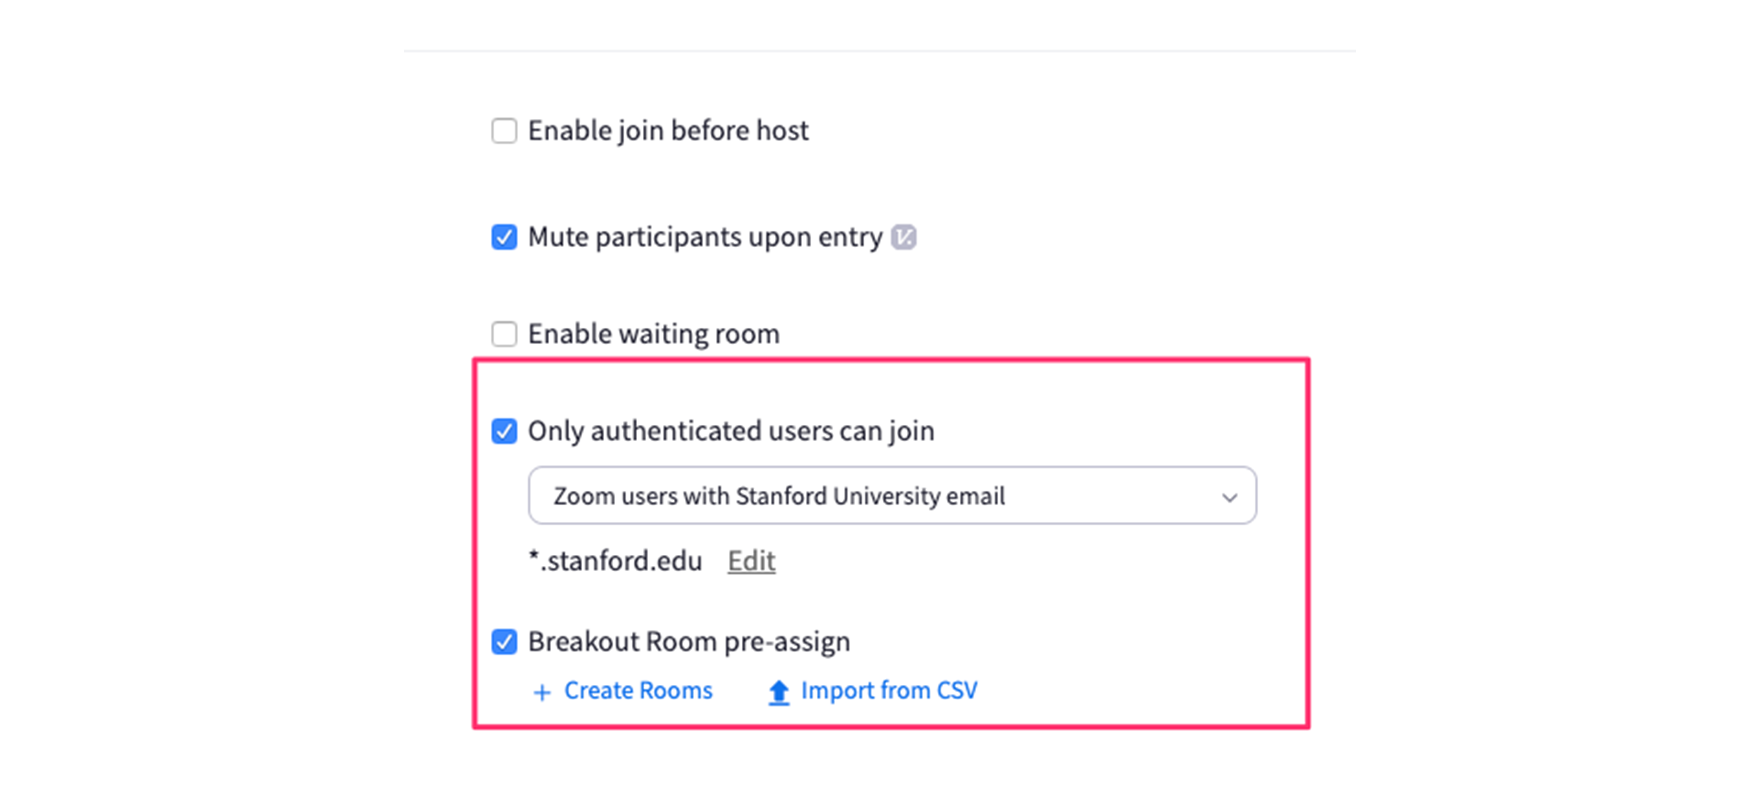
- Under the meeting option, make sure Only authenticated users can join is selected and select the Breakout Room pre-assign box.
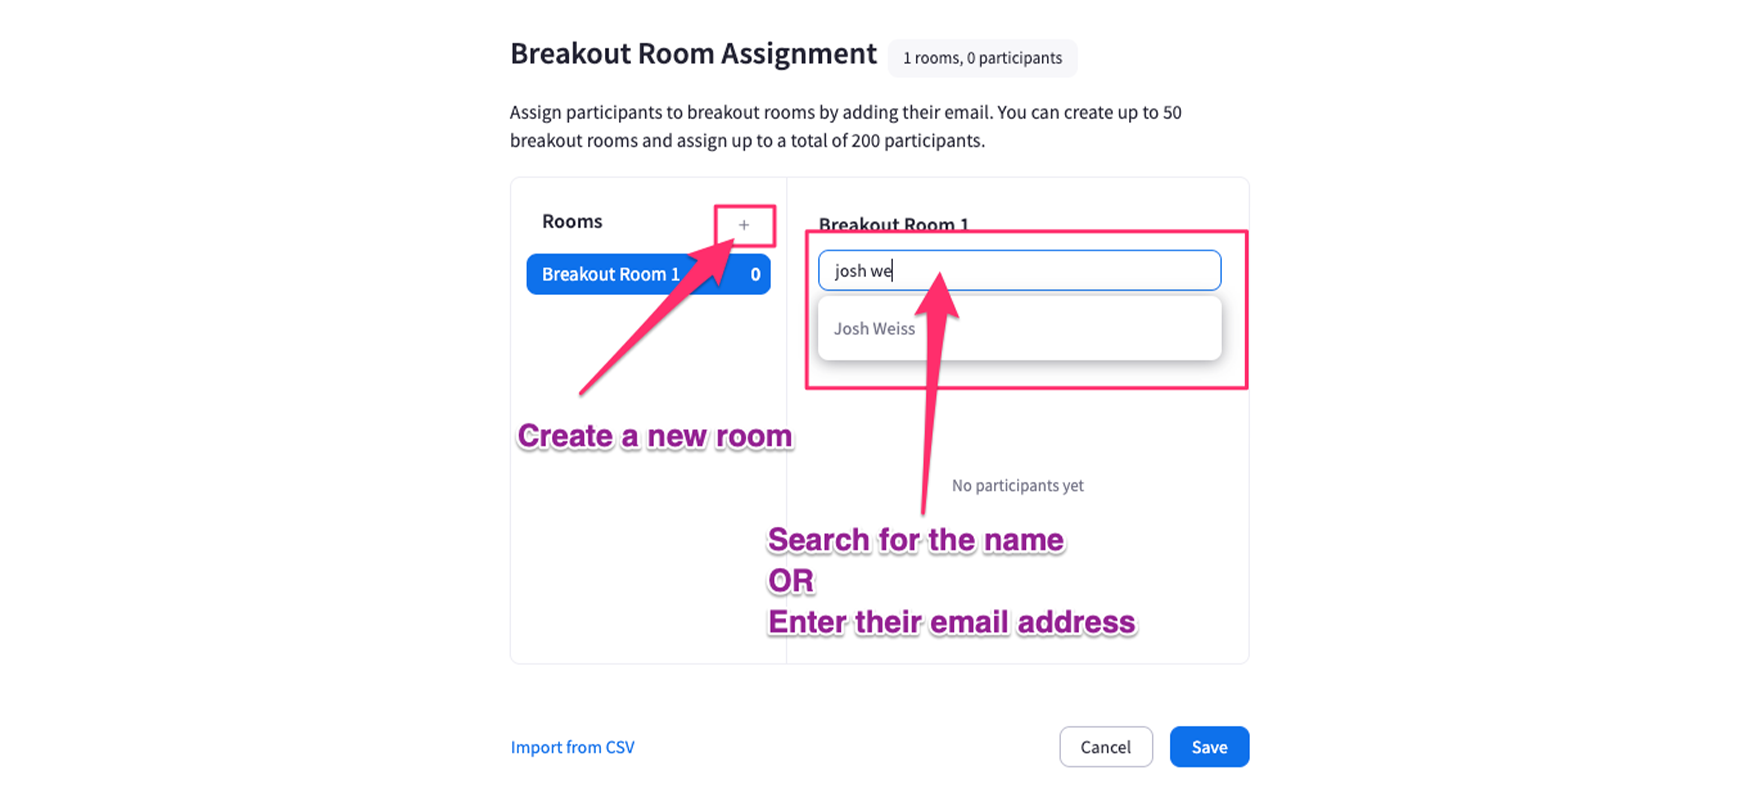
- You can add them manually by clicking the Create Rooms text or Import from CSV.
- For manual creation – click on the +Create Rooms text
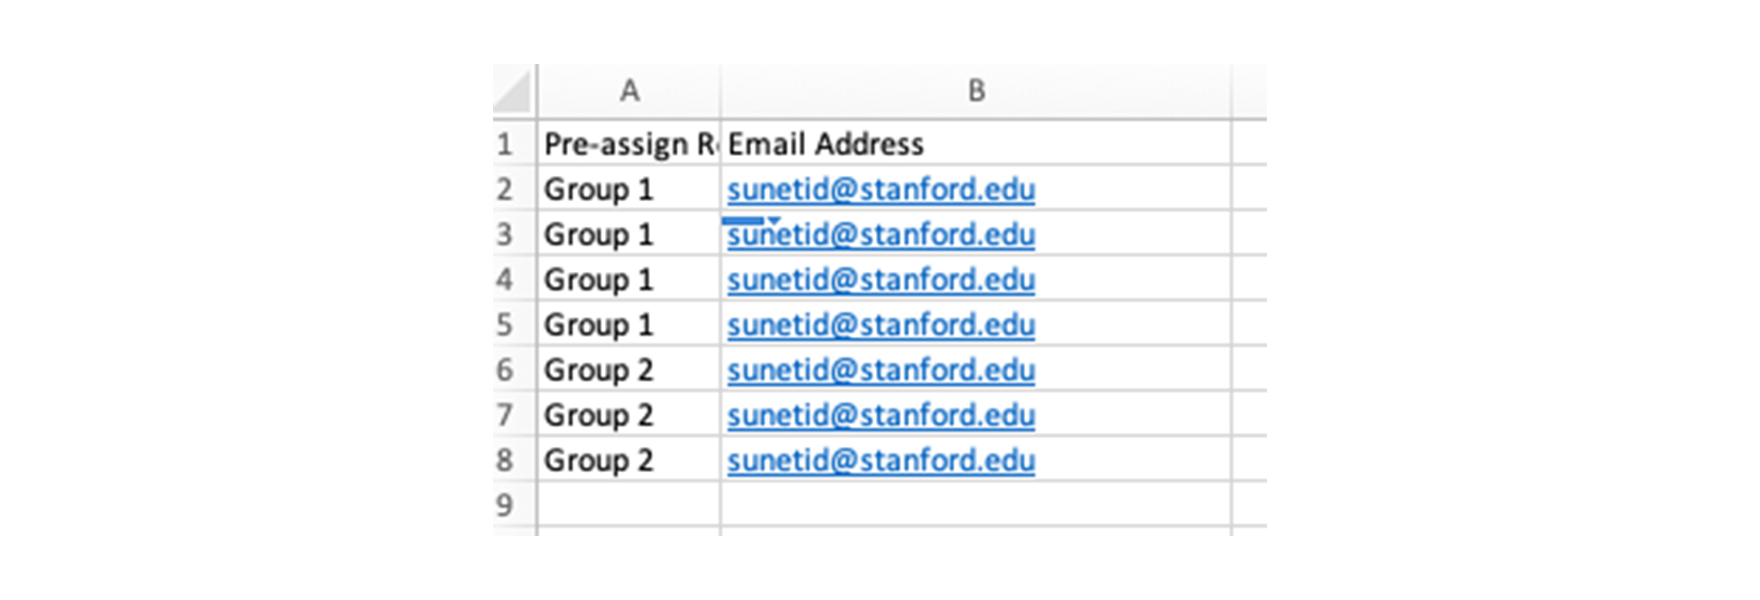
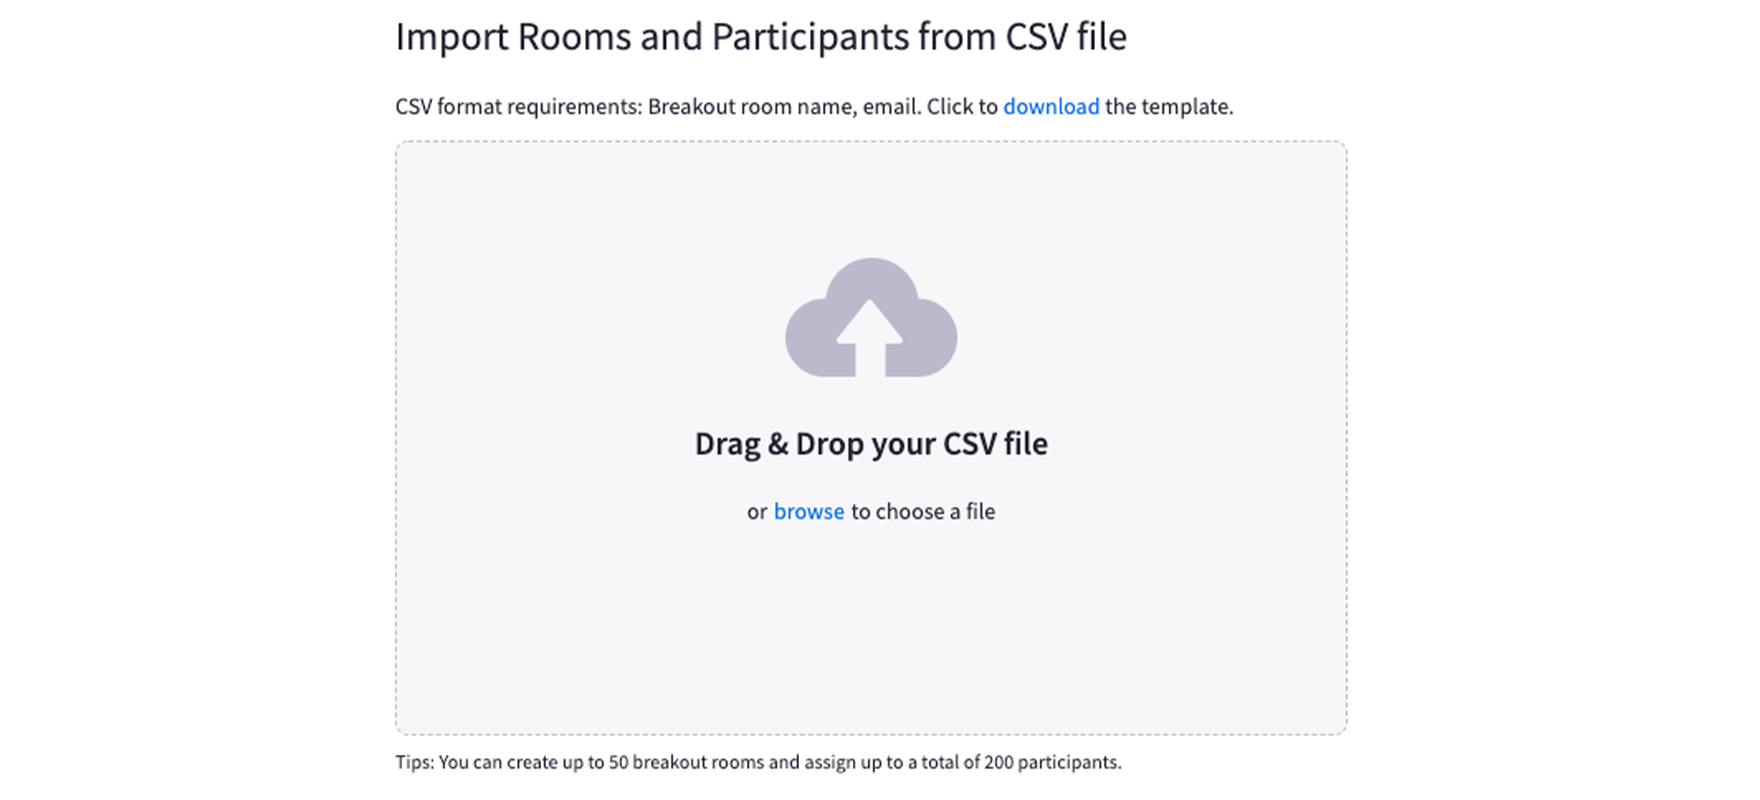
- For CSV creation – use the template provided by Zoom and upload it. (you’ll need to know your student’s email address)
- 6. When finished, click on the Save button.

- 7. Start your Zoom Session. (Be sure to log in)
- 8. Be sure to instruct your students/participants to log into their Stanford account before they join your Zoom session.
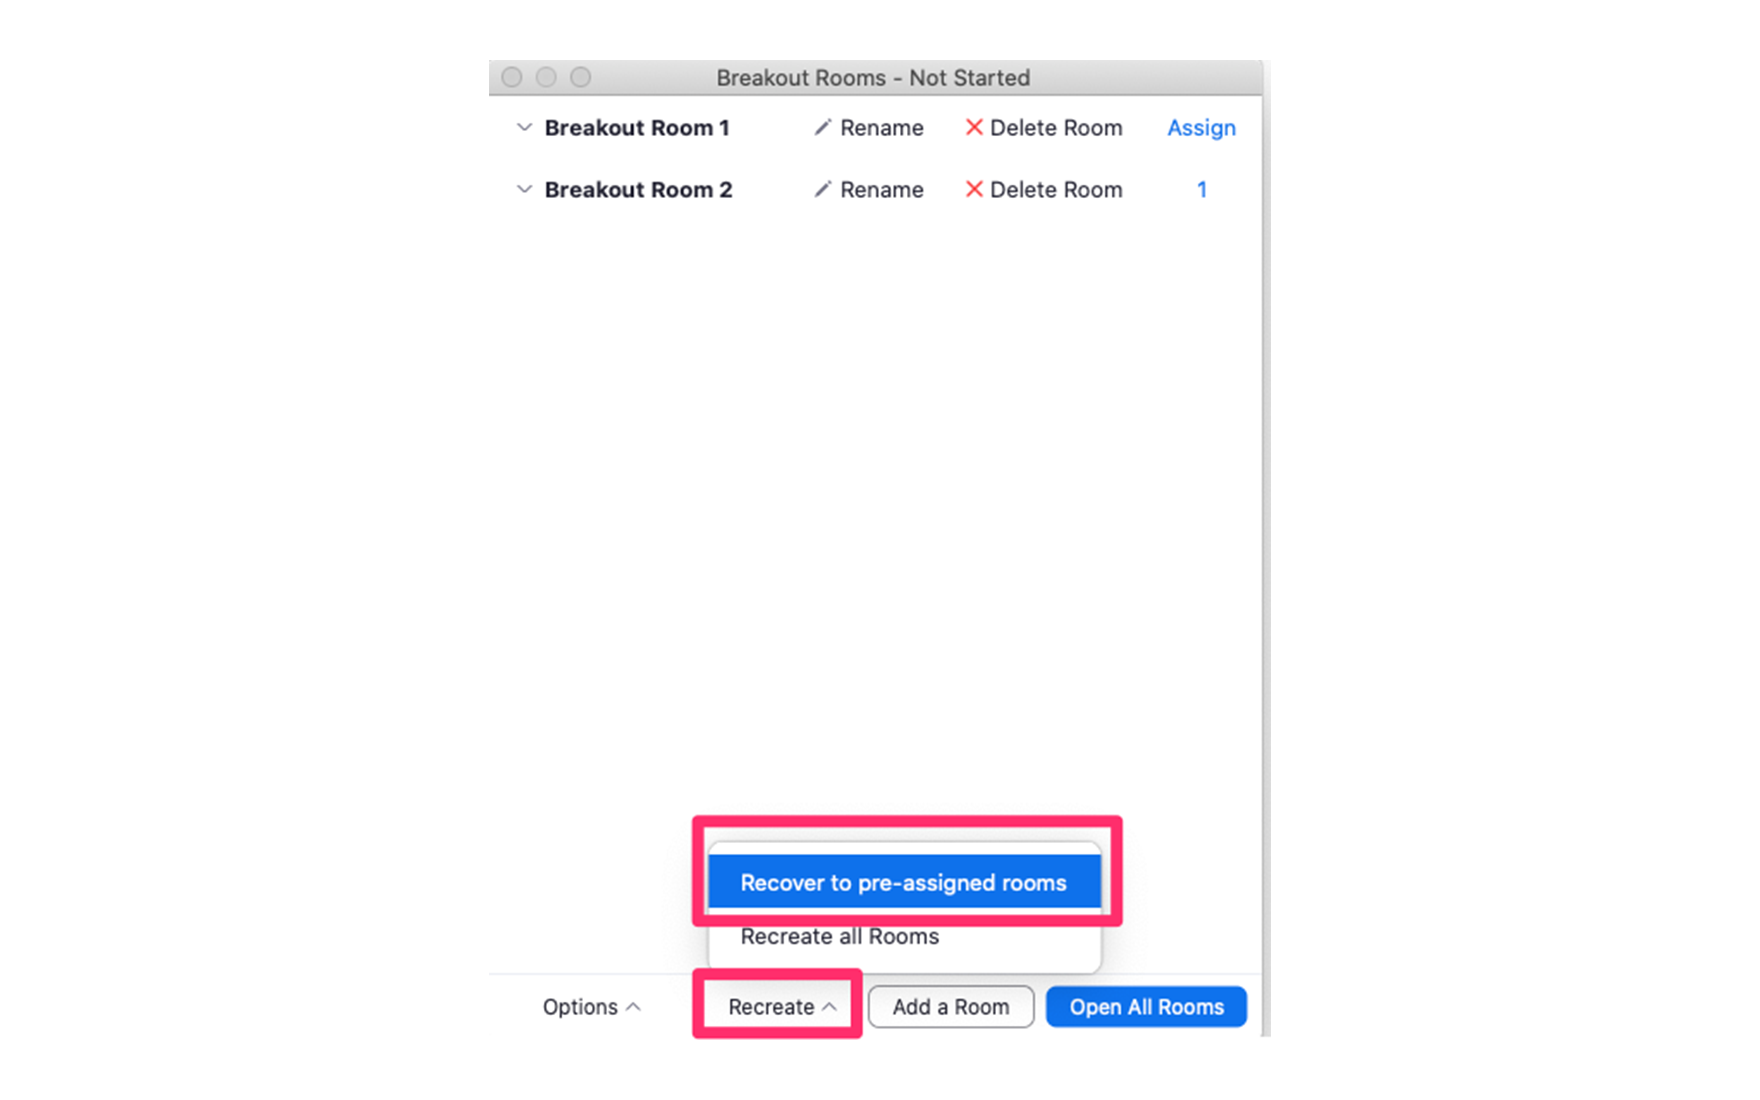
- 9. When everyone has joined your session, click on the Breakout Rooms menu > Recreate > Recover to pre-assigned rooms option. Your pre-assigned breakout room should now appear.
- 10. Now you are ready to run your breakout rooms. (Co-host views are the same)